Of all the many useful tools available on Google; one of my favorites is using Google Maps, which helps me efficiently navigate unknown locations. Additionally, while preparing for a trip, using Google Maps to calculate distances and traveling times, either by car or public transportation, helps me know what I’m getting myself into. With the GoogleMaps app installed on your phone, you may never get lost again!
In addition to the traditional map application, take the time and learn to use Google “My Maps.” It allows you to create your own itinerary and star important places. If you search for other users’ maps, you can save them under your own account then personalize them according to your own needs and desires. Best of all, you can share your maps with your traveling party. Choose to let them comment and/or add their points of interest if you’d like
Accessing MyMaps in the GoogleMaps App on Your Phone:
My Maps is an amazingly useful tool. Unfortunately, it is also very well hidden in the GoogleMaps app. Screenshots below are from the iPhone version of GoogleMaps. Make sure to download and install the app first from whatever app store fits your phone before using Google My Maps.
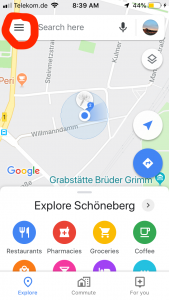
1. Open the GoogleMaps App
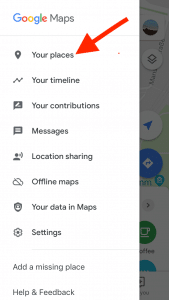
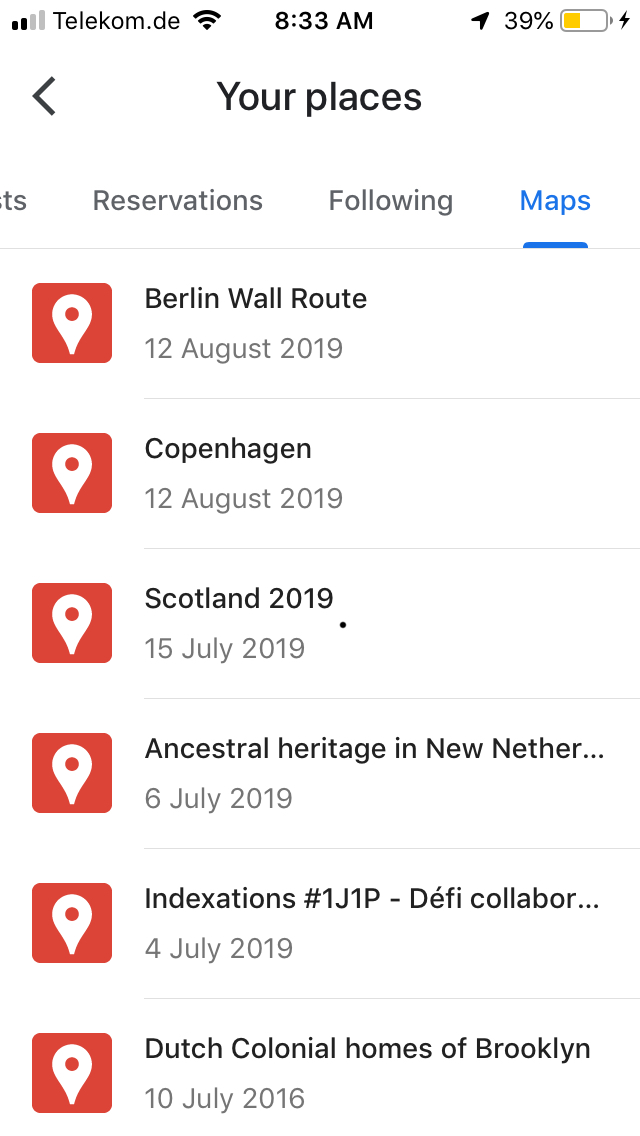
2. Click on the three horizontal lines (top left) to go to “Your places.”
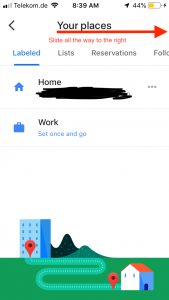
3. Slide “Your places” all the way to the right to “Maps.”
Click on “Maps”: All the maps you created, customized and/or downloaded are listed here.

4. Click on the map you need
Searching For a Published Map:
The easiest way to find a published map is to type “google my maps” and the destination: “google my maps san diego” for example. Obviously, users have created maps geared toward their own travel paths. Nevertheless, you’ll find extremely valuable insights. This London map found online has a lot of information, ranging from museums to cemeteries to historic pubs. Some maps have very detailed information, such as this amazing Berlin Wall map. To save a previously published map and be able to access it from your phone, you have to share it with yourself – see below for general instructions on sharing.
Step-by-Step Instructions on Creating Your Own Map:
1. Open https://www.google.com/maps/d/ in your browser. Make sure you’re logged in.
2. Click “Create a new map”
You have just opened a blank world map. It is first centered on your own location, but you can go to any place you chose.
3. Look for a place, select it and click “Add to map”
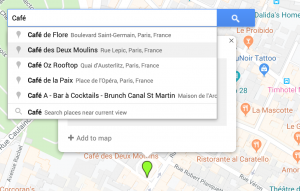
In this example, I searched for the Café des Deux Moulins – where many scenes from the movie Amelie were shot. Google helped me find the correct place and dropped a neon green pin on my map. To confirm and add this pin to my map, I clicked “Add to map.”
4. Save and customize
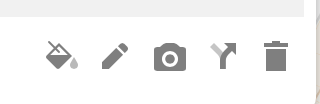
Once you add a location to your map, a small new window opens. Click on the small icons at the bottom of the new window to personalize (colors, icons), make notes, add photos, get directions and delete.
On the left, the “Style” button is very useful. You can categorize each pin in a personal way: museums, restaurants, lodgings, airports, train stations, etc. You can customize by selecting different icons and different colors. This could be especially convenient when several people are working on the same map: for instance, each person could use a specific color. You may also want to classify each item according to specific days of your trip.
The photo button lets you upload your own pictures, or pictures from the web, to your map. This might be especially appropriate when sharing a map with someone who is planning a trip similar to one you have already done.
5. Share your map

There are several easy ways to share Google MyMaps. If you want to share via Gmail, Facebook and/or Twitter, change the settings from private to your desired level of visibility. If you want to invite specific people, type their email address in the box “Invite people.” You can decide whether or not you allow others to make changes on your map and to invite additional people.
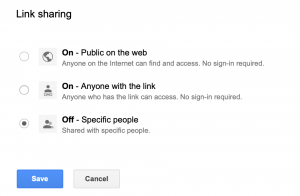
There are three levels of sharing:
- “On – Public on the web” means that anyone on the internet can view your map.
- “On – Anyone with the link” is more secure, since viewers had to get the link to your map.
- “Off – Specific people” means that your map is private to you and guests you specifically invited. This last setting is, of course, the most secure of the three.
The “Sharing” feature is extremely useful when traveling with friends or relatives, or to share an itinerary with someone doing a trip similar to yours.
6. Add Layers
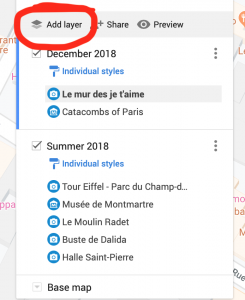
A new map only has one layer: This means that all the items you searched for and selected are shown on your map. It is possible to add up to 10 layers to a map. Click and un-click the layers to show or hide the items. For example, if you visited a city or region several times, you may want to create a layer for each one of your stays. Another good use of the layers is when several people are collaborating on the same map — each person can have his or her layer.
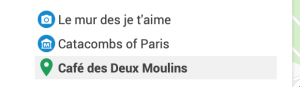
Your newly created map can look a little busy and confusing, since Google shows a lot of information along with your own. When zooming out, however, your map will mostly show your own points of interest:
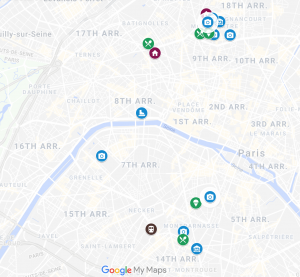
This example reveals which restaurants and museums I visited or where I went ice-skating. This map also clearly shows that I mostly visited two neighborhoods, Montmartre and Montparnasse.
>READ: BETWEEN FICTION AND REALITY, MONTMARTRE
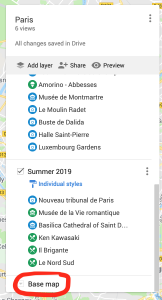
Note: Google MyMaps allows you to select a type of base map. I selected “Light political” for the above example as I mostly wanted to see my own information. Take advantage of this feature to add or remove data. The “Base map” button is located at the bottom of the main window.
Other Features
The interface allows you to undo and redo every action. But there are several other practical features to employ when using Google MyMaps
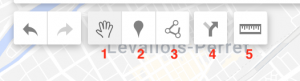
1. The “Select items” icon lets you move the map.
2. With the “Add marker” icon, you can add a pin without the searching help from Google. Click the map on the desired location and label your new item.
3. The “Draw a line” button will let you add several types of routes on your map.
The most useful are car, bike and pedestrian routes. The information will go into new layers. For all three types of routes, you can either select your starting point and destination on the map, or type the addresses in the layer box. Google will calculate the itinerary and give you step-by-step directions.
4. The “Add direction” button is very similar
Select the starting point and destination, the mode of transportation and Google will calculate the itinerary.
5. The “Ruler” icon calculates the distances between points, helping to judge distances.
These buttons are extremely useful when preparing for a trip!
This tutorial refers to an example map I created. Here is the link: https://drive.google.com/open?id=1uBSjNE1D1sSzj73W7YboU9fEhLuvvMgJ&usp=sharing
Reading this tutorial was probably a little tedious, but now comes the fun part: you get to practice using Google MyMaps. Guests coming to visit? Why not create a map of your hometown to share with them? If you just got back from a trip and want to share your experience, your map will tell the story of your adventure. Are you researching for a trip? Do you want to remember all the cool places you’ve heard about? In all these cases, Google My Maps is a very easy and practical tool to use. And, as long as you have your phone, all your maps are in your purse.
>READ: 5 THINGS TO DO IN VALENCIA, SPAIN


