Easter is just around the corner, so why not get creative and make these 5 DIY Easter crafts with your grandkids. Most of these are made from items you may already have in your home. Pickle jars work great as Mason jars, and if you have yarn hanging around, you can create your own pom-poms.
The clay pot Easter bunny can be used as décor for your home, or if you don’t glue the hat on, you can use it to hold your Easter candy. You can even use larger clay pots and create one for your front door.
Clay Pot Easter Bunny
Items Needed
- Clay Pots
- 3”, 4”, & 3” Rose Pot For Small Bunny
- 8” & 10” For The Large Bunny
- 1” for chick
- Styrofoam Balls
- ½”, 2” & 3”
- Acrylic Paint
- White
- Yellow
- Pink
- Blue
- Sponge Brushes
- Hot Glue Gun
- E6000 Glue
- Pipe Cleaners – White And Orange
- Fun Foam – White
- Wiggle Eyes In Different Sizes
- Spring Ribbon
- Medium Straw Hat
- Spring Flowers
Directions
- Paint all but the 1” clay pot white. Paint the 1” clay pot yellow.
- Each pot will need 2 – 3 coats of paint, and for the best coverage, let the pots dry for at least 10 minutes in between coats.
- Place a line of E6000 glue on the bottom rim of the large clay pot and add a line of hot glue over it.
- Next, place the bottom of the 8” clay pot on the bottom of the 10” clay pot.
- Let the whole thing dry for 24 hours.
- For the head, place a line of hot glue on the edge of the open part of the 8” clay pot and place the straw hat on top.
- Cut a slit on each side of the straw hat to stick the ears in.
- Cut bunny ears out of the white fun foam and paint the middle of the ear pink.
- Next, glue the pink to the white, cut the bottom of the ear at an angle, and then stick it in the slit of the straw hat.
- Paint one of the small styrofoam balls pink for the bunny nose.
- Paint another small styrofoam ball yellow for the chick’s head.
- While these are drying, cut the white pipe cleaners to make the bunny whiskers.
- Also, cut the orange pipe cleaner to make the chicks beak.
- Stick the wiggle eyes to the top white clay pot, and then glue the pink styrofoam ball underneath the eyes for the nose.
- Hot glue the 2” styrofoam balls underneath the pink nose – these are the cheeks.
- Place the previously-cut white pipe cleaners into the cheeks for the whiskers.
- Glue the yellow styrofoam ball to the top of the yellow-painted clay pot with hot glue; this is the chick’s head.
- Bend and stick the orange pipe cleaner into the yellow head for the beak.
- Glue the smaller wiggle eyes to the chick’s head.
- Decorate the bunny with a ribbon bow around the neck and a flower on the hat.
Decorative Plastic Easter Eggs
Items Needed
- Plastic Easter Eggs
- Acrylic Paint In Various Colors
- Small Paint Brush
- Easter Candy
Directions
- Paint polka-dots all over the outside of the plastic egg by dipping the back tip of the paintbrush into the paint.
- Continue this step with different colored eggs and paints.
- Let the paint dry for an hour.
- Fill the eggs with candy.
Mason Jar Easter Gift
Items Needed
- Large Mason Jar
- Acrylic Paint
- Easter Candy
- Spring Flowers
- Small Paint Brush
- Easter Grass
- Glue Dots And Hot Glue
Directions
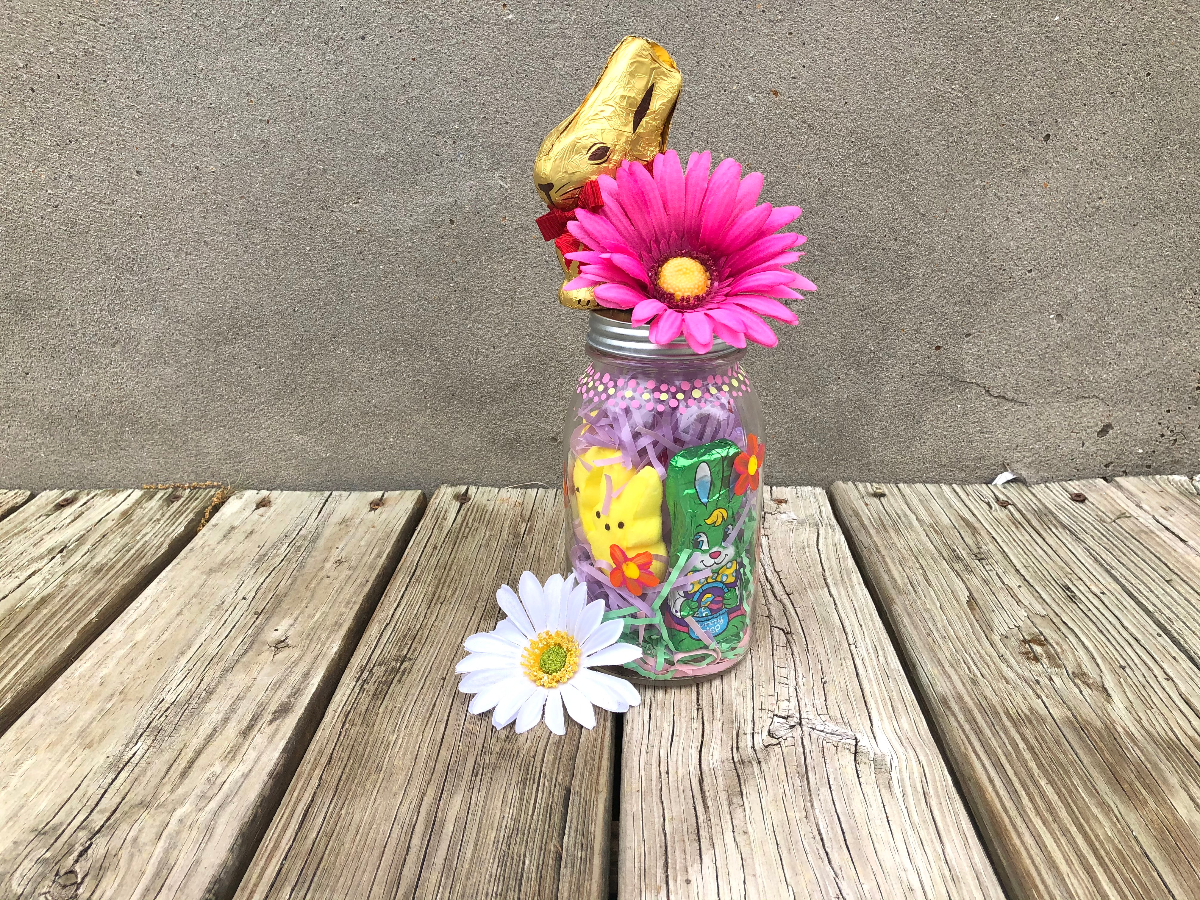
- Have fun with this one – get creative and paint whatever you want on the jar.
- Let your creation dry for an hour.
- Fill the jar with Easter grass.
- Add all the Easter candy you want.
- Glue a flower to the lid of the jar.
- Place a chocolate bunny on top of the jar; you can glue it with glue dots or craft glue.
Easter Bunny Jar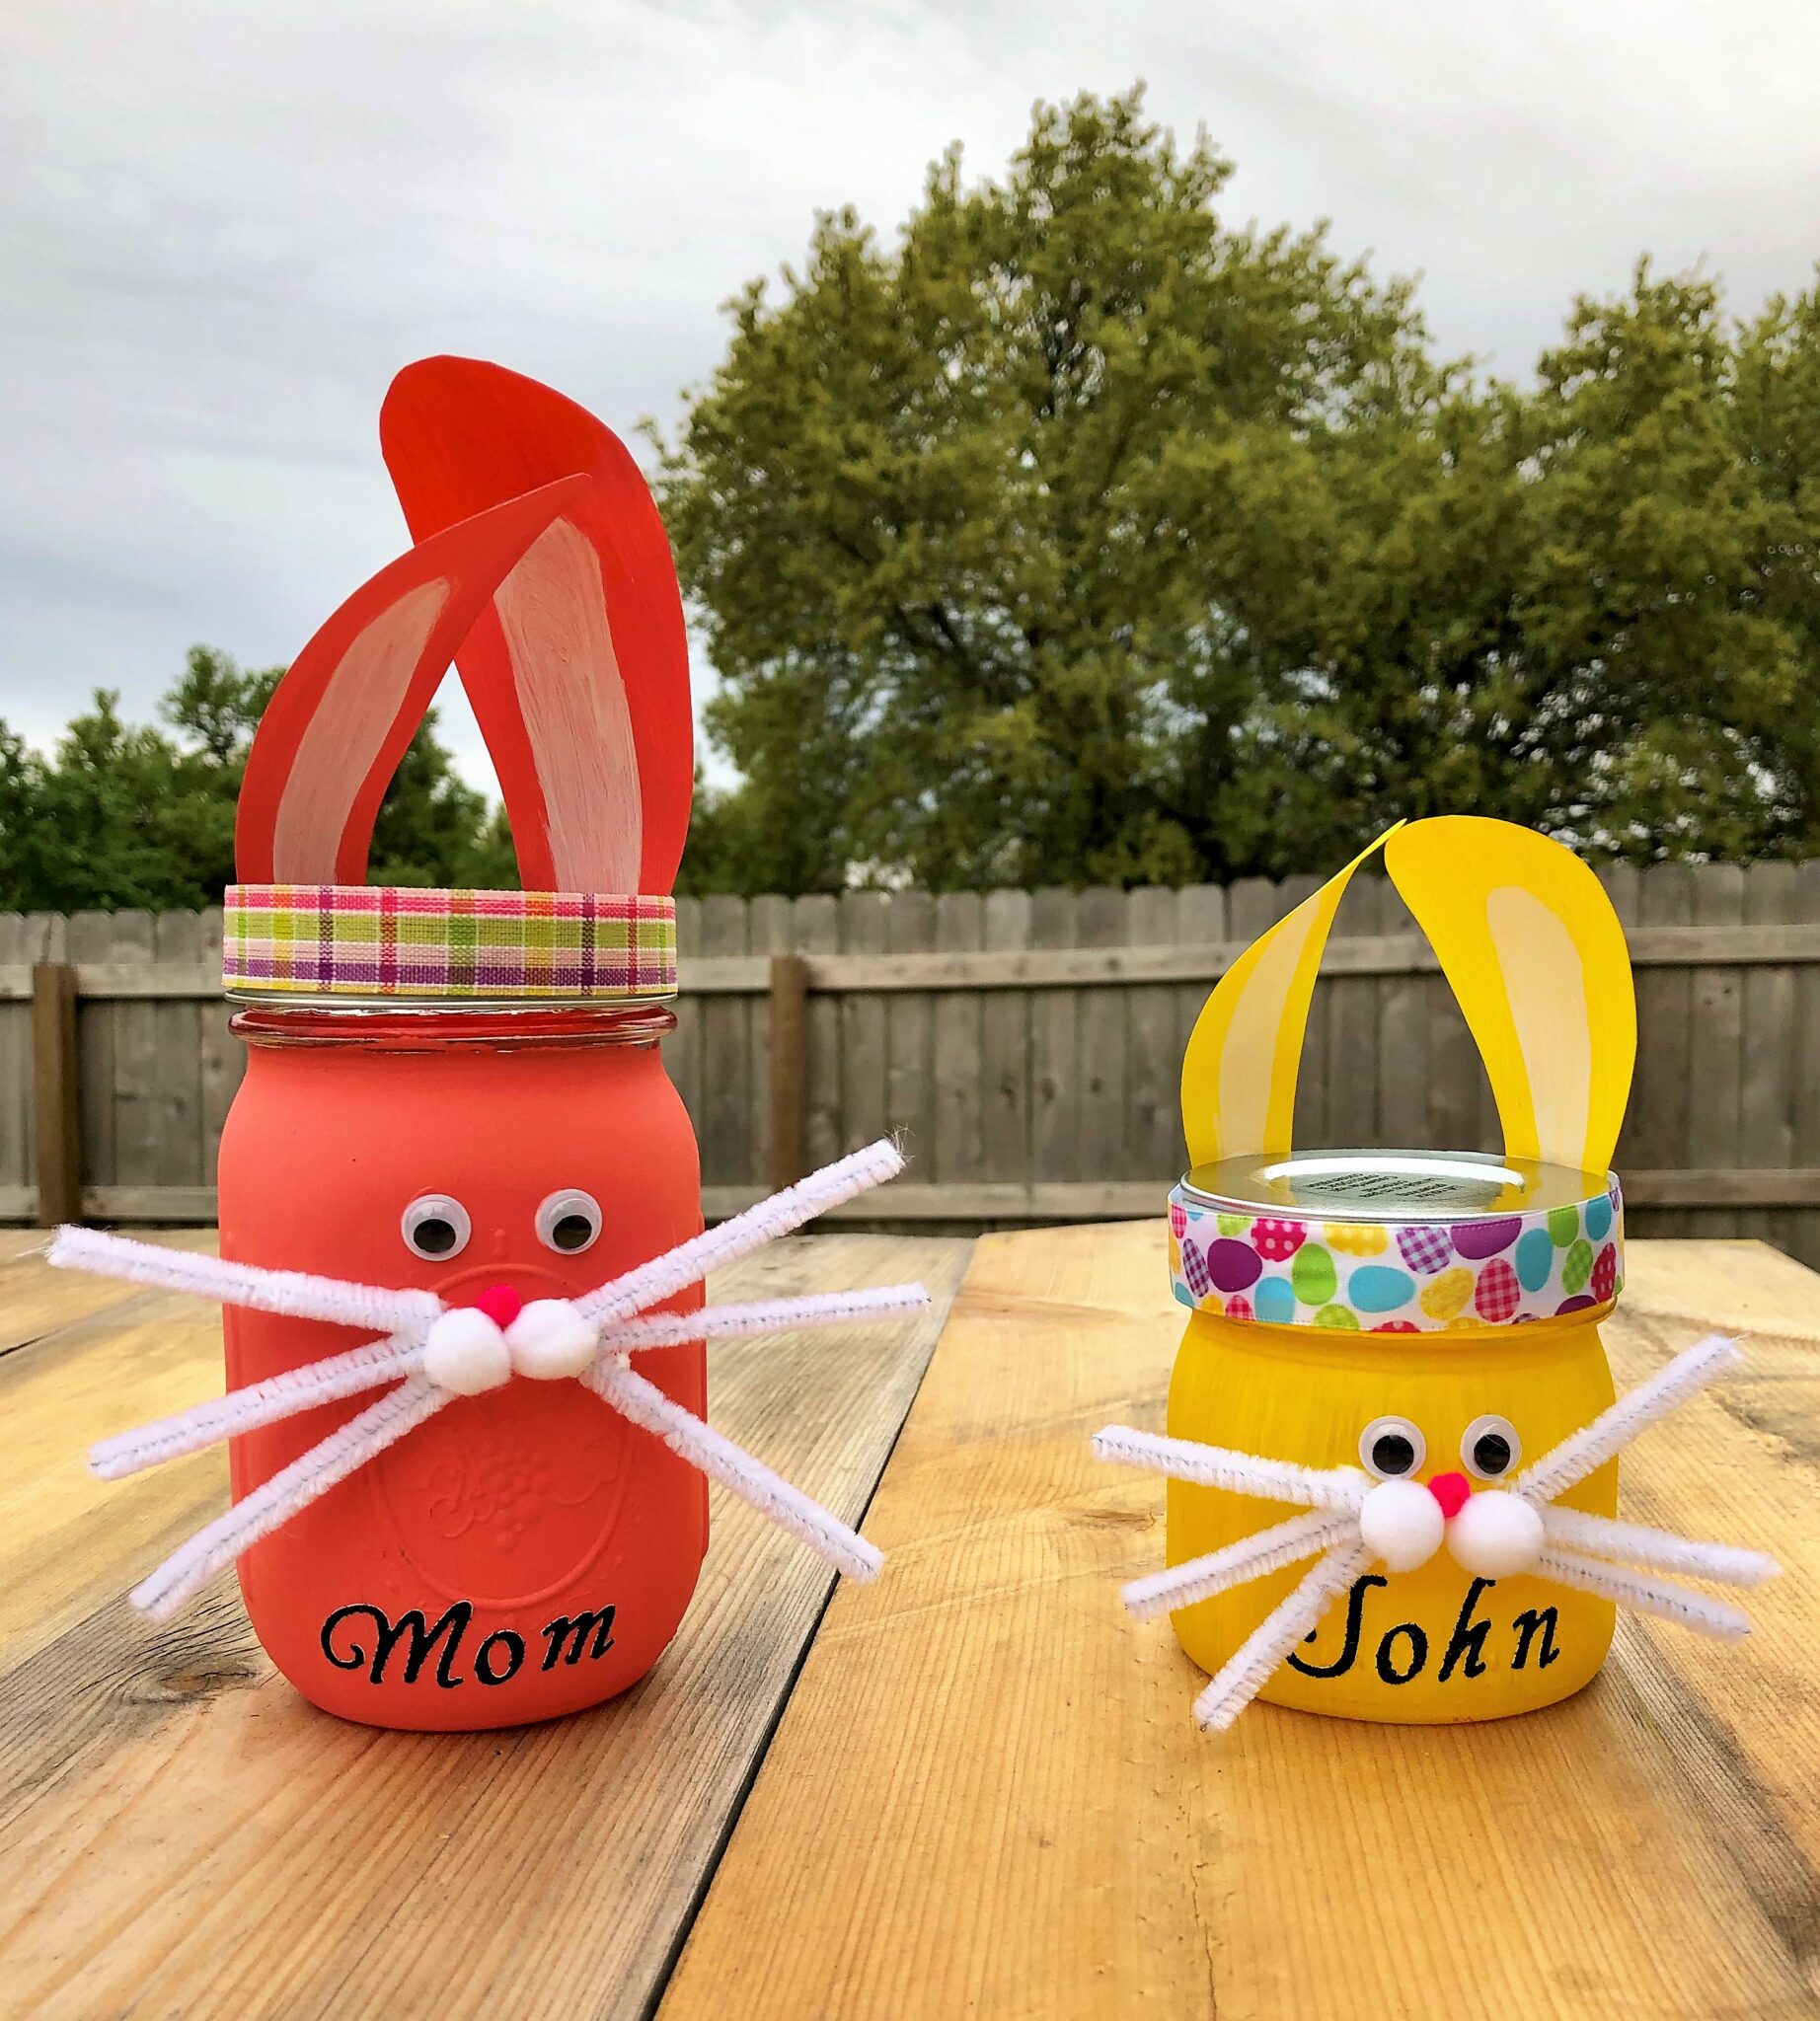
Items Needed
- Mason Jars in Different Sizes
- Acrylic Paint – Blue, Pink, and Yellow
- Sponge Brushes
- Wiggle Eyes
- White Pipe Cleaners
- 2 – ½ inch White Pom-Poms
- Small – Pink Pom-Poms
- Hot Glue Gun
- Craft Glue
- Easter Candy For The Jar
- Letter Stickers For The Name
- Spring And Easter Ribbon
- White Fun Foam
Directions
- Paint the Mason jars with your selected color.
- Paint 2 – 3 coats of the acrylic paint, letting it dry 10 – 20 minutes between coats.
- Create the ears out of white fun foam.
- Paint the center of the ears with the same color as you painted the jar they are going on.
- Cut each pipe cleaner into thirds for the whiskers.
- Using the letter stickers, create the name of each person.
- Stick the wiggle eyes to the front of the jar with craft glue.
- Glue the white pom-poms for the cheeks under the eyes, then glue the nose in the middle of the cheeks.
- Add the whiskers onto the jar with hot glue – 3 on each side of the cheeks.
- Add the ears to the jar lid using hot glue.
- Cut and glue a piece of ribbon around the lid of the jar.
- Fill the bunny jar with candy.
Jellybean Easter Bunny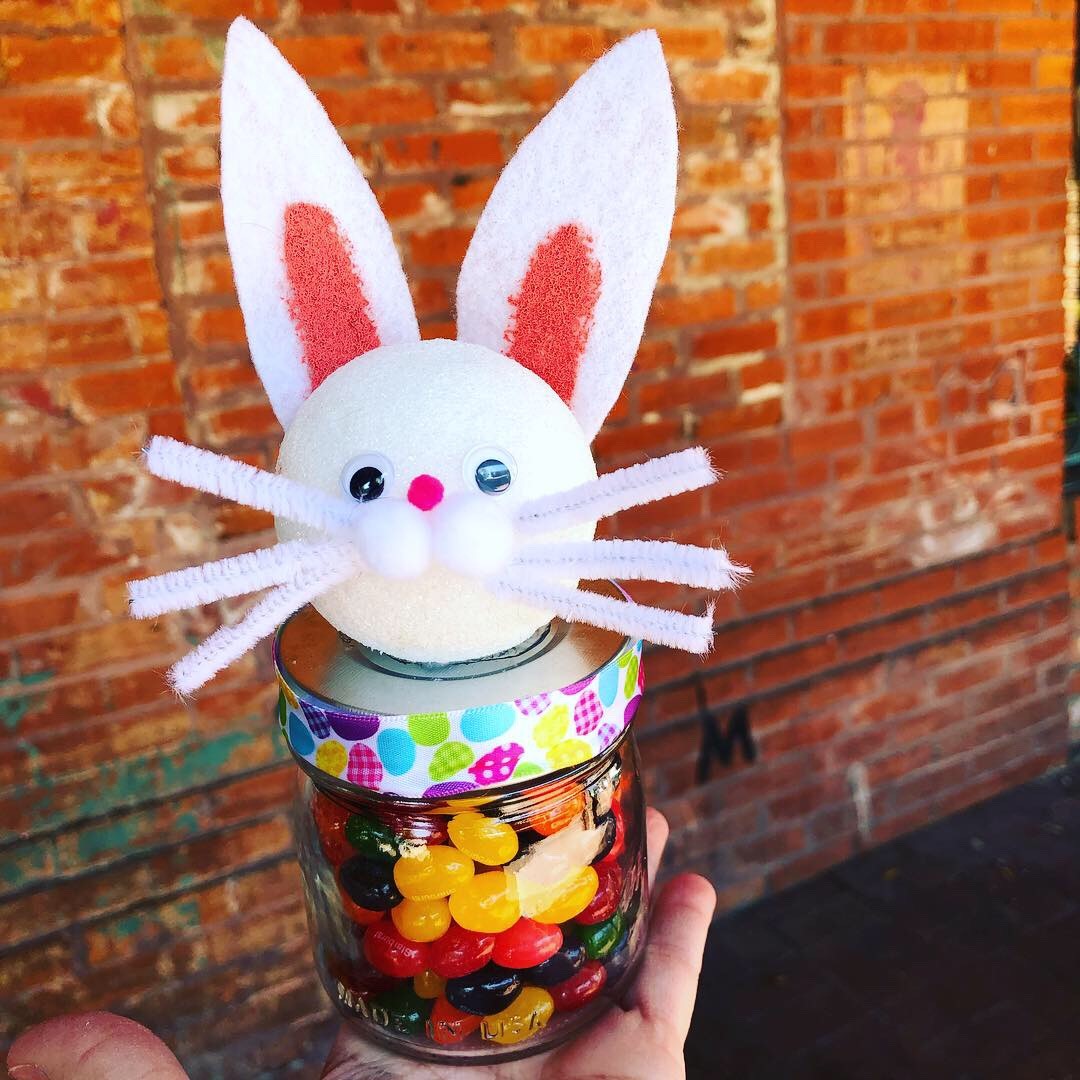
Items Needed
- Mason Jar – The small one works best
- 1 – 3 Inch Styrofoam Ball
- Wiggle Eyes
- White Pipe Cleaners
- 2 – 1/2 Inch Pom-Pom
- 1 – Small Pink Pom-Pom
- Easter Ribbon – ½ inch wide
- 1 Large White Pom-Pom
- Jellybeans
- Hot Glue Gun
- Glue Dots
- White Fun Foam
- Pink Acrylic Paint
- Sponge Brush
Directions
- Hot glue the styrofoam ball to the lid of the jar.
- Next, hot glue the large pom-pom to the back of the jar.
- Cut the ears out of the white fun foam and paint the middle of the ear pink.
- Hot glue the ears to the back of the bunny’s head.
- Using the craft glue, stick the wiggle eyes on the head.
- Next, add the pink nose and white pom-pom cheeks.
- Cut the pipe cleaners into 1″ whiskers and hot glue them under the pom-pom cheeks.
- Glue the Easter ribbon around the lid of the jar.
- Fill the bunny jar with jellybeans.
These are just a few examples of the fun DIY Easter crafts you can do with your grandkids. Whatever you end up doing, have fun and enjoy the day!
Read Next:

