How do the celebrity makeup artists get their clients’ makeup to look so good? The secret is as easy as having the right tools and a few great products in your makeup kit. Here’s how you can apply makeup like a celebrity artist.
Learn How To Apply Makeup Like a Celebrity Makeup Artist
Start with a clean, moisturized face, and don’t forget to add a bit of moisturizer under the eyes too. A moisturized face is the best foundation for a flawless finish.
Primer
Next up, primer. This is one small addition to your routine that all celebrity makeup artists use. Smashbox is the holy grail for me. They have a ton of formulations. If you have sensitive skin, Kiehl’s Micro-Blur Skin Perfector is loaded with natural ingredients. The key to primer is to use sparingly, starting in the center of your face and blend outward with fingers. Use an eye shadow primer for your lids. A small dab tapped/blended on the lid and crease. Milani‘s is a bargain and Urban Decay Primer Potion is a cult classic. For more great selections read Best Face Primers for Women Over 50.

Foundation
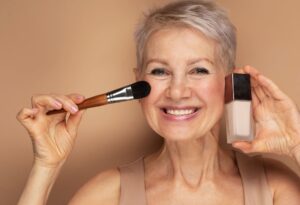
Celebrity makeup artists have been doing airbrushed foundations since the 1980’s. To get the same effect on your own, apply foundation with a brush. Dot your foundation all over, concentrating on the center of your face and work out. Using a light hand, start in the center of your face and brush toward your hairline then down toward your jawline (it keeps the peach fuzz camouflaged!). Continue under the jaw and a bit down your neck. If you see any brush strokes, lightly tap with the pads of your fingers or a beauty blender or sponge. Real Techniques Expert Face Brush or their Blend + Blur All Over Brushes are top quality at $10-20.

Eyes and Brows
Well-manicured brows will give your face a polished look and frame your eyes. Do not over pluck. Stronger brows are in, so play up what you have. Fill in thinning areas with your preferred pencil or powder product. Consider using a tinted brow gel if your brows are full and tend to be unruly. Two good ones that are easy on the budget are Colourpop Brow Boss and Benefit Gimme Brow. Gimme Brow is at a higher price point, but it is a fan favorite.

Eyeshadow is completely up to the individual, but for an expert look, plan to use at least 2-3 shades, one on the lid, a darker shade to contrast in the crease, and a light shimmer shade for highlighting the brow bone. Having a few palettes in your kit, with a good variety of shades, will get you the most looks. Tapping off the excess before applying = less fall out.
I used to always use my under-eye concealer after foundation. A pro tip, let your shadow do its fall out, then use a fan brush to whisk it away. Apply concealer using a light hand, concentrating on the inner eye. Blend by tapping with ring fingers toward the outer eye. A great dual-ended brush that blends foundation and concealer is IT Cosmetics Heavenly Luxe Complexion Perfection Brush #7. Curl your lashes with a simple crimper. I’ve had an ELF lash curler for years and just change the rubber part every 6-8 months.

Liner is something that may take some practice. Follow the shape of your eye and brow. Keep liner at the outer part of the upper eyelid, going in a more upward stroke. You can even end before your lid starts its downturn. For a professional effect, do a little cat-eye flick or thicken the line on the outer third. I prefer a softer line under the eye and often use shadow or smudge the pencil.
Blush and Highlight
Cream blush is the professional’s go-to. You get a very natural, glowing “healthy from within” look with cream blush. Dot on with your finger and build to the level you want. Pixi by Petra On-the-Glow sticks and the e.l.f. palette quad are my picks.

Contouring and highlighting is another area that amps up your makeup application. Go from simple to special with a few extra touches. Think of contour as where you want something to recede, under cheekbones or along a jawline that’s gotten a bit softer. Highlight places that would naturally be lit by the sun, top of cheekbones, center of nose, top of cupid’s bow. I prefer to use a powder contour because it’s easy to build up and blend. Many contours and highlight products will come together in a palette, making it even easier. Rimmel makes one under $10. A stand-alone highlighter I love is benefit’s Watts Up!

Lips
Last but not least, LIPS! Start with lips that are exfoliated. An easy way to accomplish that is to use a dampened face cloth when doing your normal cleanse. If your lips are dry, your lipstick will not go on well, and fine lines will be magnified. Even one swipe with a lip balm can help. Professionals always line the lips and then apply lipstick. It gives a sharp, polished look. I recommend having a few basic liner colors in your kit. A nude, a pink, a red, and one other that pairs well with your favorite go-to lip color. Milani, Wet N’Wild, and NYX are excellent.

Powder
Finish off the look with a light dusting of setting powder. I prefer a loose formula. I’ve been using Coty Airspun since I was in middle school, but lately I’ve been trying out Kat Von D’s Lock-It. Use a big fluffy face brush, again Real Techniques has you covered at less than $10 or Bare Minerals has some good ones at under $30.

Most importantly, have fun with it, and don’t be afraid to experiment. Only have a few minutes to get ready? Watch our 5-minute face tutorial!


