When your back hurts, there’s nothing like some good stretches to release tightness and gently nudge your spine back into alignment. While you’ll benefit in many areas of your body, this collection of stretches are yoga poses for back pain specifically.
> STUDIES FIND THAT YOGA HELPS DEPRESSION: SAY OM
Try these two standing stretching poses back to back. Both poses are demonstrated by Noelle Leon-McQueen.
Upward Salute
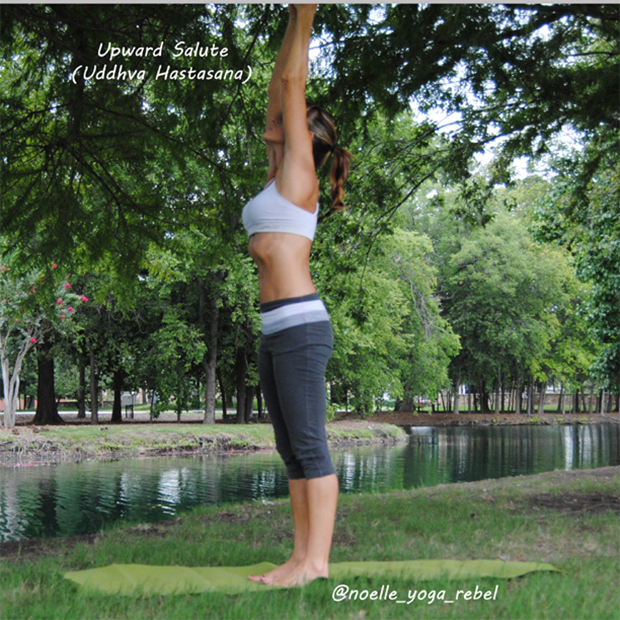
1. Begin by standing tall. Turn your arms outward (or laterally) so that your palms face away from your torso and thumbs point backward. With an inhale, sweep your arms out to the sides and up toward the ceiling.
2. If you’re tighter in the shoulders, stop when your arms are approximately parallel to each other. But, if possible without hunching your shoulders forward, press your palms firmly together by touching the bases of your palms first, then the palms themselves, and, finally, the fingers.
3. Extend your elbows fully and reach up through your pinkies so that your thumbs turn slightly down toward the crown of your head. Make sure not to compress the back of your neck. Tip your head back slightly and gaze at your thumbs.
4. Don’t let your lower front ribs protrude forward. Bring your front ribs down (toward your pelvis) and in (toward your spine). Lengthen your tail bone toward the floor. Then, lift your rib cage evenly away from your pelvis to stretch the circumference of your belly. Hold for a few breaths.
5. Exhale and, as you sweep your arms out to the sides, tip your torso forward from the hip joints to fold into Standing Forward Bend
Standing Forward Bend
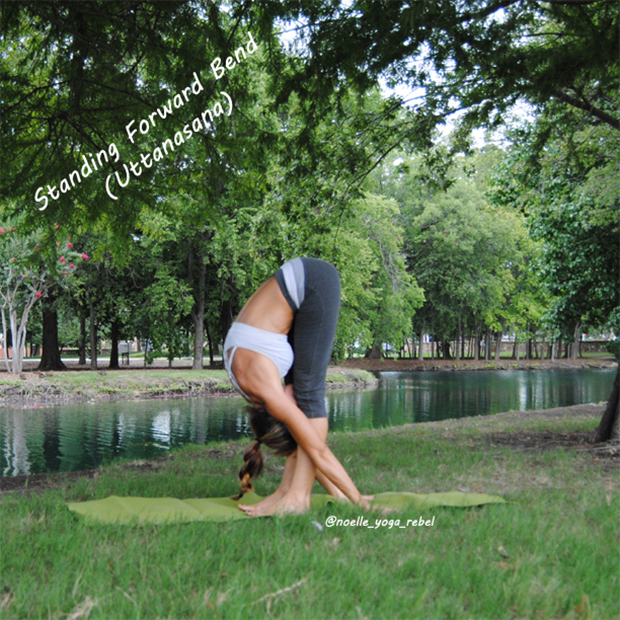
1. Begin by standing tall, with your hands on your hips.
2. Exhale as you bend forward at the hips, lengthening the front of your torso.
3. Bend your elbows and hold on to each elbow with the opposite hand. Let the crown of your head hang down. Press your heels into the floor as you lift your sit bones toward the ceiling. Turn the tops of your thighs slightly inward. Do not lock your knees.
4. If you can, keep the front of your torso long and your knees straight. Place your palms or fingertips on the floor beside your feet. Bring your fingertips in line with your toes and press your palms on the mat. Those with more flexibility can place their palms on the backs of their ankles.
5. Engage your quadriceps (the front thigh muscles) and draw them up toward the ceiling. The more you engage your quadriceps, the more your hamstrings (the rear thigh muscles) will release.
6. Bring your weight to the balls of your feet. Keep your hips aligned over your ankles.
7. Slightly lift and lengthen your torso with each inhalation. Release deeper into the pose with each exhalation. Let your head hang.
8. Hold the pose for up to one minute. To release, place your hands on your hips. Draw down through your tailbone and keep your back flat as you inhale and return slowly to standing tall.
9. Repeat 5-10 times.
Gate Pose (Parighasana)
Gate pose stretches the side of the body from the hips to the fingers, increases flexibility of the spine, builds core strength and stimulates digestion, circulation, and respiration. If your back is in pain, move into the yoga pose slowly.
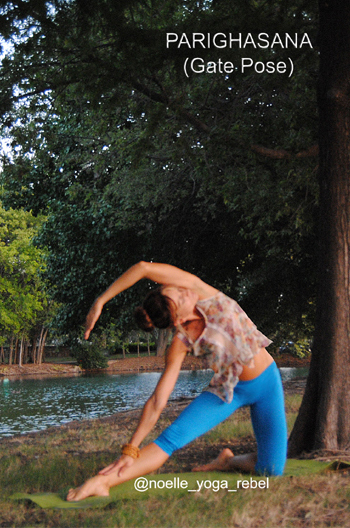
- From a kneeling position, with the knees hip width apart, step the right leg straight out to the side with the foot flat on the floor, toes facing the side wall.
- Inhale the left arm up to the ceiling, with the right hand resting palm down on the right leg.
- Exhale the left arm towards the right, dropping over the ear, and slide the right palm down towards the toes, keeping the arms straight.
- Press out through the left hip. Press down into the foot and knee and reach out through the fingers and crown of the head. Keep the chin off the chest, looking straight ahead. Press the top shoulder to the back wall, keeping the chest open.
- Breathe and hold for 3-8 breaths.
- To release: inhale the left arm up and bring the right knee next to the left.
- Repeat on the other side.
- Place folded blanket under the bent knee if you need extra cushion.
Modified Chair Pose on Your Back
Lead by Noelle Leon-McQueen
Use this Yin Yoga Pose to stretch the hamstrings, glutes and hips kicking tight muscles to the curb. Hold for 3-5 minutes to help open not just tight muscles but go deeper into the tissue and fascia to start creating ease in movement. This is a modification of One-Legged Utkatasana (Awkward Chair Pose). It can be done safely on your back as in the video or even sitting in a chair. While not targeting the back specifically, if you have tight hips, it contributes to stiffness in your back. So it definitely belongs in your arsenal of yoga poses for back pain.
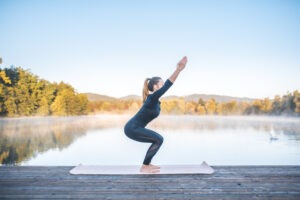
Chair Pose
Lead by Veronica Torres
Chair Pose (Utkatasana) gives strength to your thighs and ankles, while elongating the shoulders, butt, hips, and back. It gives lots of stretching to the Achilles tendons and shins, and can be therapeutic for flat feet. Utkatasana also stretches the shoulders and opens the chest area. All areas which contribute to an aching back.
Chair Pose One Breath at a Time
Give yourself grace. One breath at a time can help with patience and progress.
1. Start by standing long straight and strong, with your feet separated hip distance apart and parallel to one another. Separate your toes wide and ground down through all four corners of your feet — the big toe mound, pinky toe mound, and the two outer edges of the heels.
2. Inhale, sweep your arms overhead with your palms facing one another. Keep your ears in line with your arms and relax your shoulders low.
3. Exhale and bend your knees deep or as far as you can go without any strain, as if you are sitting into a chair. Bring your thighs as close to parallel with the floor as your body feels comfortable allowing, and keep your knees about a hip distance apart.
4. Keep your weight grounded firmly through your heels and shift your hips back until your knees begin to stack directly over your ankles.
5. Notice also if your torso begins to collapse forward, and instead keep your chest slightly lifted and your collarbone broad. Firm up the low belly to create a sense of tone.
6. Bring your belly button to your spine and allow your tailbone to point straight down toward the ground and maintain length along your spine.
7. Hold the pose for two to five full, deep breaths. To come out of the pose, straighten your legs slowly on an inhale, and bring your arms to your sides- exhale; alternately, use an exhale to fold forward into Uttanasana for a more subtle exit.
Variation: Practicing Chair Pose standing with slight bends at your knees or at a wall is a great way to develop the strength and practice to really do a fully expressed pose.
Want more? Add in Downward Facing Dog and Triangle pose. After you’ve gotten some relief doing these yoga poses for back pain, add in additional poses designed to strengthen your core and keep that back strong.
READ NEXT: YOGA FOR BRAIN HEALTH: COULD YOGA POSES NOW PREVENT DEMENTIA LATER?
Shop our favorite yoga accessories and clothing:


>READ NEXT: FIGHT AGING WITH STRETCHING
>READ NEXT: WILL CBD HELP THE PAIN IN YOUR JOINTS AND MUSCLES